The Ultimate Guide: How to Build a Stunning Patio Koi Pond in Your Backyard
Introduction
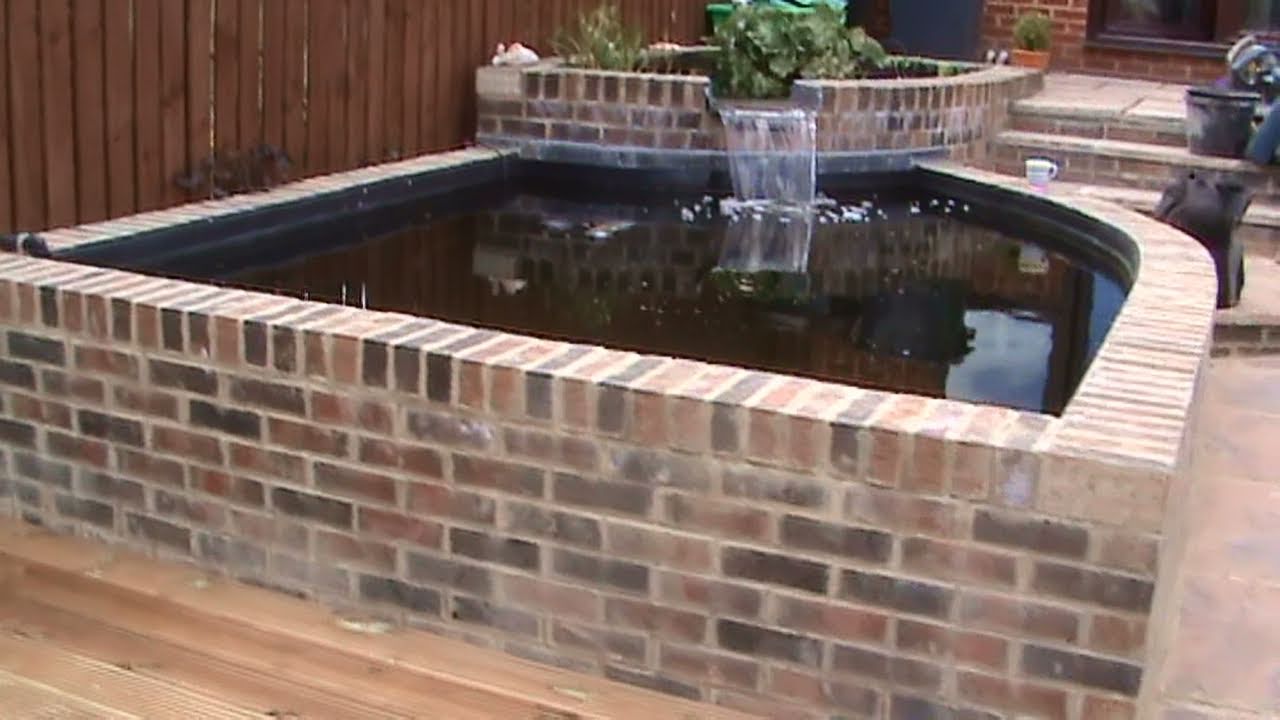
Do you dream of transforming your backyard into a serene retreat? A patio koi pond may be just what you need! These beautiful water features not only enhance the aesthetic appeal of your outdoor space but also create a relaxing atmosphere. Whether you’re a DIY enthusiast or just starting out, this guide will take you through the process of building your own stunning patio pond.
Why Choose a Patio Koi Pond?
A koi pond adds a unique and fascinating element to your backyard. Koi fish are often seen as symbols of good fortune, and their bright colors and graceful movement can be mesmerizing. Koi ponds also create a relaxing ambiance, providing the perfect escape from the stresses of daily life. A patio pond is especially appealing, as it can be built right next to your outdoor seating area, allowing you to fully enjoy the tranquil sound of the water and the beauty of your fish.
Step 1: Plan Your Pond
Before you start digging, you’ll need to make a plan for your pond. Here are some factors to consider:
- Size: How much space do you have available? What size pond would look best in this area?
- Location: Do you want to build your pond next to your patio or in another part of your backyard? Will it receive enough sunlight and shade?
- Design: What shape do you want your pond to be? What materials will you use to construct it?

Once you’ve answered these questions, you can start sketching out a design for your pond. Consider the depth of the pond and the type of filtration system you’ll need to keep the water clean and healthy for your fish.
Step 2: Gather Materials
After you’ve planned your pond, it’s time to gather materials. Here’s what you’ll need:
- Flexible pond liner
- Pond pump and filter
- Koi fish (optional)
- Water plants (optional)
- Rock or stone for the edges of the pond

You can purchase these materials at your local hardware store or online. Make sure to get the right size liner for your pond, and choose a pump and filter that are appropriate for the size of your pond.
Step 3: Excavate the Pond
Now it’s time to dig! Here’s how to excavate your pond:
- Mark the outline of your pond using spray paint or another marker.
- Dig out the area inside the marked outline to a depth of at least 2 feet. This will provide enough space for your koi to thrive.
- Create shelves around the edges of the pond where you can place plants or rocks.
- Smooth the bottom of the pond to remove any sharp rocks or roots.

Excavating your pond can be the most labor-intensive part of the process. Depending on the size of your pond, you may want to enlist the help of friends or family members to make the job easier.
Step 4: Install the Liner
After you’ve excavated the pond, it’s time to install the flexible liner. Here’s how to do it:
- Unroll the liner and lay it in the pond, making sure it covers the entire area with a few inches of extra liner around the edges.
- Smooth out any wrinkles or folds in the liner, taking care not to puncture it with sharp objects.
- Fill the pond with water, stretching the liner as needed to ensure a tight fit.
- Trim the excess liner around the edges of the pond.

Be careful not to puncture the liner as you install it. If you do get a tear or hole, you can patch it with a special pond liner patch kit available at most hardware stores.
Step 5: Add Rocks and Plants
Now it’s time to add some natural features to your pond! Here’s how to do it:
- Place rocks or stones around the edges of the pond, creating a natural-looking border.
- Add water plants such as lilies or water hyacinths to help keep the water clean and provide shelter for your fish.
- Arrange larger rocks or boulders in the pond to create hiding places for your fish.

Adding plants and rocks to your patio pond can help it blend in seamlessly with your outdoor space, creating a natural oasis where you can relax and unwind.
Step 6: Install the Pump and Filter
To keep your pond clean and healthy for your fish, you’ll need to install a pump and filter system. Here’s how to do it:
- Choose a pump and filter that are appropriate for the size of your pond.
- Install the pump and filter according to the manufacturer’s instructions.
- Position the pump in an area of the pond that receives good water circulation.
- Run the electrical cord from the pump to an outdoor electrical outlet.

A good filtration system is key to maintaining a healthy environment for your fish. Make sure to clean the filter periodically to keep it running properly.
Step 7: Add Your Fish (Optional)
Now comes the fun part – filling your pond with fish! Here’s how to do it:
- Choose koi fish that are healthy and vibrant in color.
- Introduce your fish slowly to the water to allow them to acclimate to their new environment.
- Feed your fish a high-quality diet and monitor their behavior to ensure they are healthy.
Koi fish are known for their beautiful colors and graceful movement. They make wonderful additions to any patio pond and can be a source of endless entertainment and enjoyment.
Conclusion
A patio koi pond is an attractive and peaceful addition to any backyard. By following these steps, you can build your own stunning pond that adds value to your home and provides a relaxing escape from the hustle and bustle of daily life. Start planning your pond today!