How to Build a Stunning Koi Pond with Concrete
Introduction
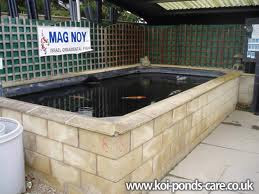
A beautiful koi pond can add elegance and serenity to any outdoor space. However, building a koi pond can be a daunting task. If you want a long-lasting pond that is easy to maintain, then a concrete build is the way to go. In this article, we’ll take you through a step-by-step guide on how to build a stunning and durable koi pond using concrete.
1. Planning and Designing Your Koi Pond
The first step to building a koi pond is to come up with a plan and design. Here are some factors to consider:
- Size: Decide on the size of the pond. Koi ponds should be a minimum of 1000 gallons and at least 3 feet deep.
- Location: Choose a location that is not near any tree roots or power lines. The location should also be away from direct sunlight to prevent algae growth.
- Shape: Decide on the shape of the pond. You can choose from round, square, or even a custom shape.
- Landscape: Think about the surrounding landscape. Incorporate natural rocks and plants to create a natural-looking environment.
2. Excavation and Base Preparation
Once you have a plan and design, the next step is to excavate the area for the pond. Here’s how to prepare the base:
- Dig the hole: Dig the hole in the shape and size of the pond. The depth should be a minimum of 3 feet.
- Add gravel: Add a layer of gravel at the bottom of the hole. This will act as a base for the concrete.
- Level the base: Use a level to ensure that the base is levelled.
- Install a Skimmer: Set up and install a skimmer. This will help remove debris and keep the water clean.
3. Build the Pond Frame
The next step is to start building the frame of the pond. Here’s how to do it:
- Build wooden forms for the pond: Using 2x4 wooden boards, construct forms to shape the pond. These forms will act as a mould for the concrete.
- Install a drainage pipe: Install a drainage pipe in the bottom of the pond. This will help drain out any excess water.
- Secure the forms: Use stakes to secure the forms in place.
- Apply concrete: Mix and apply concrete in layers to the wooden frame until it is completely covered. Smooth out any uneven surfaces and make sure it is levelled.
4. Finishing Touches
Once the concrete is dry, it’s time to add the finishing touches to the koi pond. Here’s what you need to do:
- Install a liner: Apply a liner to the concrete to prevent water leakage.
- Add water: Fill the pond with water.
- Install a filtration system: Install a filtration system to keep the water clean.
- Add rocks and plants: Add natural rocks and plants to create a natural-looking environment.
- Add Koi: Finally, add the koi to the pond and enjoy your stunning creation.
Conclusion
Building a koi pond using concrete requires planning, patience, and attention to detail. However, the result is a beautiful and long-lasting koi pond that is easy to maintain. Follow the above steps, and you’ll have a stunning koi pond that will be the envy of your neighbourhood.


