DIY Guide: How to Repair Your Koi Pond Liner with a Koi Pond Liner Repair Kit
Introduction
Koi ponds add beauty and tranquility to any outdoor space. However, due to wear and tear or accidents, it is not uncommon for leaks to occur in the pond liners. Fortunately, with the right tools and a bit of DIY spirit, repairing your koi pond liner has never been easier! In this article, we will guide you through the process of using a koi pond liner repair kit to fix small leaks in your pond liner.
What is a Koi Pond Liner Repair Kit?
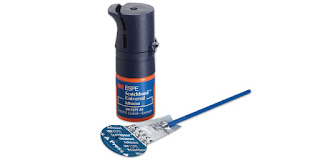
A koi pond liner repair kit typically contains a patch or patches, an adhesive, and sometimes a primer. The patch is made of a durable material such as EPDM rubber or PVC and is designed to stick to the damaged area of the liner. The adhesive is applied to both the liner and the patch to create a strong bond that will withstand the weight of water in the pond.
Step-by-Step Guide: Repairing Your Koi Pond Liner
Step 1: Identify the Leak
Before you can repair your koi pond liner, you need to locate the source of the leak. If you notice that your pond is losing more water than usual, it is likely that there is a leak. Fill your pond with water to its usual level and then wait 24 hours. If the water level drops significantly, you have a leak. In most cases, the leak should be within a few inches of the water level. Inspect this area for damage to the liner such as punctures or tears.
Step 2: Clean the Area
Once you have located the leak, you need to clean the area around it. Use a scrub brush and soap to remove any algae or debris from the liner. Be sure to rinse the area well with water and let it dry before proceeding to the next step.
Step 3: Cut the Patch
Using the koi pond liner repair kit, cut a patch that is about two inches larger than the damaged area of your pond liner. Make sure that the patch fits well and that there is no more than an inch of overlap on any side of the damaged area.
Step 4: Apply the Primer
If the repair kit contains a primer, apply it to the damaged area and the patch with a brush. Allow the primer to dry according to the manufacturer’s instructions. If your kit does not contain a primer, skip to step 5.
Step 5: Apply the Adhesive
Apply a generous amount of adhesive to the damaged area of the liner and to the underside of the patch. Use a brush to spread the adhesive evenly on both surfaces. Make sure that the adhesive covers the entire damaged area and that there are no gaps or bubbles.
Step 6: Apply the Patch
Carefully place the patch over the damaged area of the liner and press down firmly. Smooth out any wrinkles or bubbles with your hands. Make sure that there are no gaps between the patch and the liner, as this can cause leaks in the future.
Step 7: Wait for the Adhesive to Dry
Allow the adhesive to dry completely according to the manufacturer’s instructions before refilling your pond. This usually takes between 24 and 48 hours. Once the adhesive is dry, fill your pond with water and wait another 24 hours to check for leaks.
Conclusion
Repairing a koi pond liner is a simple and cost-effective solution to leaks and tears. With the help of a koi pond liner repair kit and this guide, you can fix small leaks in your pond liner quickly and easily. Remember to always follow the manufacturer’s instructions when using a repair kit and to wait for the adhesive to dry completely before refilling your pond. Happy pondkeeping!


