10 Simple Steps to Build Your Own Beautiful Koi Pond
Introduction
Are you looking for an elegant water feature that will add beauty and calmness to your garden? Building your very own homemade koi pond may seem like a daunting task, but it can be much easier than you think. With a little bit of planning, some elbow grease, and patience, you can construct a stunning koi pond that will become the focal point of your backyard. In this article, we will guide you through the simple steps to build your own koi pond without breaking the bank.
Step 1: Choosing the Location
The first step in building a koi pond is to choose the right location for it. A good location for a koi pond is an area that has easy access to electricity, is not near trees with large roots, and has a good amount of sunlight. It should also be a place that you can enjoy, such as a patio or deck area. Once you have chosen the location, mark the outline of the pond with spray paint or a garden hose.

Step 2: Selecting the Pond Size
The second step is to decide on the size of your pond. There are two major factors when considering the size – the number of koi fish you want to keep and the size of your backyard. Generally, koi ponds should be at least 1000 gallons and at least 3 feet deep to provide enough space for the fish to move around. Also, make sure to check with your local building codes before digging a pond. Some areas require permits for ponds over a certain size.
Step 3: Excavating Your Pond
Once you have your location and pond size determined, it is time to begin excavation. Begin by digging the hole for the pond using a shovel and a wheelbarrow. The depth of the hole should be equal to the depth of the pond, plus an additional six inches of space for sand and pond liner.

Step 4: Setting Up the Underlayment
After you have dug out the hole, fill it with one inch of sand for a soft cushion to protect the liner from rocks and debris. It is important to make sure the sand is evenly spread, so use a rake to adjust as needed. For added protection, you can also place a geotextile or underlayment fabric over the sand layer. The underlayment acts as a barrier between the sand and the liner, preventing any holes or punctures.
Step 5: Laying the Pond Liner
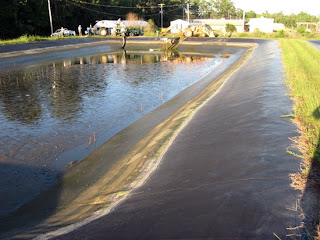
The pond liner is the most critical component in any pond installation. It is the barrier that holds the water inside the pond. You can choose from EPDM or PVC liners, both of which have varying advantages. EPDM is more flexible and durable, while PVC is more resistant to UV rays and punctures. Make sure to choose a size that fits your pond and lay it over the sand layer, making sure there are no wrinkles or folds that can trap water.

Step 6: Filling the Pond with Water
After the liner is in place, you can start filling your pond with water. Make sure to use a water conditioner to remove chlorine or other harmful chemicals from tap water before adding it to the pond. Keep a close eye on the water level and add more water as needed until it reaches the desired level.
Step 7: Installing the Filter and Pump
Your pond needs a filter and pump system to keep the water clean and prevent stagnation. The filter removes debris, while the pump circulates the water to prevent algae growth and provide oxygen. You can choose from many different types of filters and pumps, depending on your needs and budget. It is important to follow the manufacturer’s instructions when installing the filter and pump, and to ensure they are properly connected to the electrical source.

Step 8: Adding Rocks, Gravel, and Plants
Now that your pond is filled with water and has a filter and pump system in place, it is time to start adding some character to your backyard oasis. You can add rocks and gravel to the pond’s edges and plant aquatic plants and flowers in the water. Planting plants in the pond helps balance the ecosystem and provides some shade for the koi fish.

Step 9: Introducing Fish to Your Pond
Finally, it is time to add the koi fish to your pond. Before introducing the fish, ensure the water temperature is suitable, and the pump and filter system is working correctly. Start by gradually adding the fish to the pond, allowing them to acclimate to their new environment. Make sure to feed them a high-quality diet, and keep a watchful eye on their behavior and wellbeing.
Step 10: Maintaining Your Koi Pond
After completing the installation of your koi pond, it is essential to maintain it regularly to keep the water clean, and the fish healthy. Regular maintenance includes cleaning the filter and pump, removing debris from the pond, adding water when needed, and monitoring the water chemistry. With proper upkeep, your koi pond will provide a peaceful and gorgeous addition to your backyard for many years to come.
Conclusion
Building a homemade koi pond is a fun and rewarding project that anyone can do if they have the right tools and know-how. By following the simple steps outlined in this article, you can create a visually stunning and serene water feature that your family and friends will love. Remember, patience and attention to detail are key when building a koi pond. Whether you’re a seasoned water gardener or a novice DIYer, building a beautiful koi pond is an excellent way to add some tranquility and beauty to your backyard.